High-content screening is, at its core, a statistical exercise. A compound library gets tested, controls get measured, and the separation between those populations determines whether the assay is worth running at scale. The Z' factor — the statistic that quantifies that separation — is calculated from your positive and negative control wells. But its value is determined long before the assay runs.
Imaging variability is the most common non-biological cause of a marginal Z' factor. Before investing further in reagent optimization or protocol revision, it is worth verifying that the imaging subsystem is not introducing avoidable variance into the control populations.
Where Z' Factor Variance Actually Comes From
The Z' formula is (1 – (3σp + 3σn) / |μp – μn|), where p is the positive control and n is the negative control. A value of 0.5 or above is conventionally considered an acceptable assay. A value below 0.5 typically triggers investigation.
The standard response is to look at the biology: is the positive control reliable? Is the cell seeding density consistent? Are the reagents stable? These are all legitimate questions. But σp and σn are both affected by imaging variance in ways that are independent of the cellular biology.
Specifically: if the imaging system has uneven illumination across the field of view (a flatfield problem), cells in the periphery of each well image will have systematically different measured intensities than cells in the center. That within-field spatial bias inflates the standard deviation of both control populations, directly reducing Z'. If the imaging system has day-to-day gain drift — common with lamp-based widefield systems as the bulb ages — the mean signal of the positive control can shift between plates, introducing between-plate variability on top of the within-plate variability.
The Pre-Analysis Checklist That Protects Assay Quality
The following steps should be completed before a HCS campaign is declared ready for library screening. They are not time-consuming — together they add two to four hours of upfront work per instrument — but they have significant downstream impact on data quality.
Step 1: Characterize Illumination Uniformity Per Channel
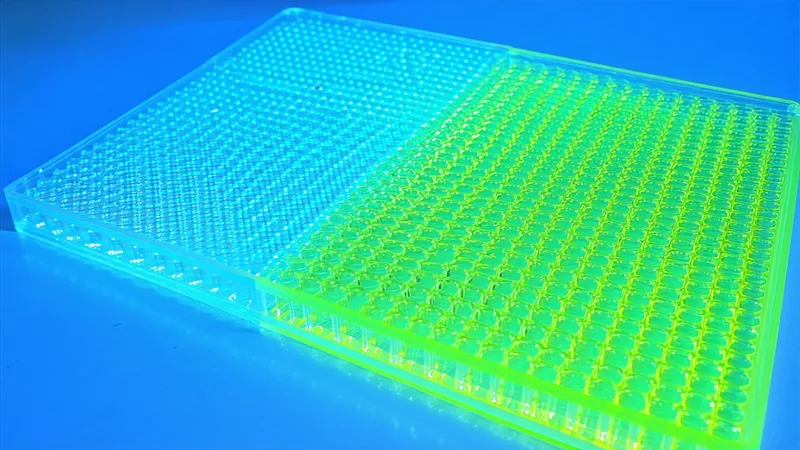
Image a fluorescent flat-field reference in every channel you will use in the assay. A well of dilute fluorescein in aqueous solution or a fluorescent plastic calibration slide works well. The resulting image should be approximately uniform across the field. Measure the intensity at the center of the field and at four peripheral positions. A ratio of center-to-edge intensity greater than 1.15 (i.e., more than 15% drop at the edge) warrants either flatfield correction or a reduction in the imaged field size to exclude the peripheral region.
This measurement should be recorded as part of the assay validation documentation and repeated after any instrument service, lamp replacement, or objective change.
Step 2: Verify Temporal Stability of the Excitation Source
For lamp-based systems, the intensity of the excitation source drifts during warm-up and declines over the lamp lifetime. Run a time-series acquisition of the flat-field reference over 30 to 60 minutes to quantify warm-up drift. If mean intensity changes by more than 5% over this window, a warm-up period before acquisition is mandatory and should be specified in the SOP.
For laser-based systems, temporal stability is typically better, but fiber coupling efficiency should be checked after transport or if the system has not been used for several weeks.
Step 3: Apply Flatfield Correction Images to All Biological Acquisitions
Flatfield correction should be applied as a pre-processing step before any segmentation or intensity measurement. The corrected image Icorr is computed as Icorr = (Iraw – Idark) / (Iflat – Idark), where Idark is a dark frame acquired with the shutter closed and Iflat is the mean of multiple flat-field reference images. The normalization factor scales the corrected image to the mean intensity of the flat-field, preserving relative intensity values.
Step 4: Document Acquisition Parameters as Absolute Values, Not Percentages
Instrument-relative parameters — "50% laser power," "400 ms exposure," "gain 2" — are not reproducible across instruments or over time on the same instrument. Document the photon flux at the sample plane where possible, or establish a reference measurement procedure (e.g., argolight slide or calibration microspheres) that is run at the beginning of each acquisition session to verify that the system is within specification relative to a baseline.
Step 5: Run a Mini-Z' Experiment Before the Full Screen
Before committing to a library campaign, run a dedicated Z' plate: a full 384-well plate with alternating columns of positive and negative controls. This gives you 16 to 24 wells of each control condition, enough to estimate Z' robustly and diagnose spatial patterns. If the column-by-column Z' values show edge effects or gradients, the flatfield correction is insufficient or the plate handling is introducing variability. Address this before scaling up.
A Scenario: Transferring an Assay Between Imaging Systems
Consider an HCS assay developed and validated on a spinning-disk confocal in one building, which needs to be transferred to a widefield epifluorescence system in a different facility for library screening. The assay uses a DAPI nuclear channel for segmentation and a GFP-channel readout for the phenotypic measurement.
On the confocal, the assay produces a Z' of 0.72. On the widefield system, the first transfer run produces a Z' of 0.41 — below the acceptance threshold. Investigation reveals two contributing factors: the widefield system has 22% illumination drop at the plate corners compared to 8% on the confocal, and the widefield system uses a broader emission filter bandpass that captures more cellular autofluorescence in the GFP channel, raising the negative control mean and increasing its variance.
After applying flatfield correction and implementing a rolling-ball background subtraction step to handle the autofluorescence floor, the Z' on the widefield system rises to 0.63. The biological assay has not changed. Only the imaging pre-processing chain has been corrected to match the optical characteristics of the new system.
What Z' Does Not Tell You
We are not saying that a Z' of 0.5 guarantees a high-quality screen. Z' is calculated from control wells, which are typically at the extremes of biological response. It does not directly measure the assay's ability to detect weak partial-agonist effects or compounds with heterogeneous cell population responses. A high Z' can coexist with poor sensitivity for low-efficacy compounds.
Z' also does not capture imaging artifacts that are consistent across wells — a systematic background floor, a channel bleed-through that affects all wells equally, or a focus drift that degrades resolution uniformly across the plate. These can reduce assay quality without depressing Z'. The pre-analysis checklist above catches the variable sources of imaging noise; catching the systematic sources requires additional analysis of the flat-field response and per-well focus scores.
Carrying the Correction Through the Pipeline
One practical difficulty with pre-processing corrections in HCS workflows is that they are often applied inconsistently. If the flatfield correction is applied in the image acquisition software, it may be baked into the stored images, making it impossible to verify or re-apply later. If it is applied in the analysis software, it may only be applied to some channels or some wells depending on how the workflow was configured.
For reproducible HCS campaigns, the correction step should be documented explicitly in the methods, and the correction images (flatfield reference and dark frame) should be stored alongside the biological data so that the pre-processing can be replicated or audited. This is particularly important for studies that aim to compare results across multiple sites, multiple time points, or multiple instruments — conditions under which undocumented pre-processing decisions become a significant source of analytical irreproducibility.
The investment in imaging characterization at the start of a screen pays dividends in data quality throughout the campaign. An assay that starts with a well-characterized imaging system is less likely to produce spurious hits from instrument drift, less likely to fail Z' unexpectedly mid-campaign, and more likely to yield quantitative readouts that transfer across platforms without extensive re-optimization.